
Install guide · Analog Vision Studio · Capture One
Install your Capture One styles in a few minutes, with the installer or by hand.
The film stocks come as styles, in six exposures, built for the camera you chose in the shop. Start with the installer, the manual route is the backup.

On this page
01 · Your pack
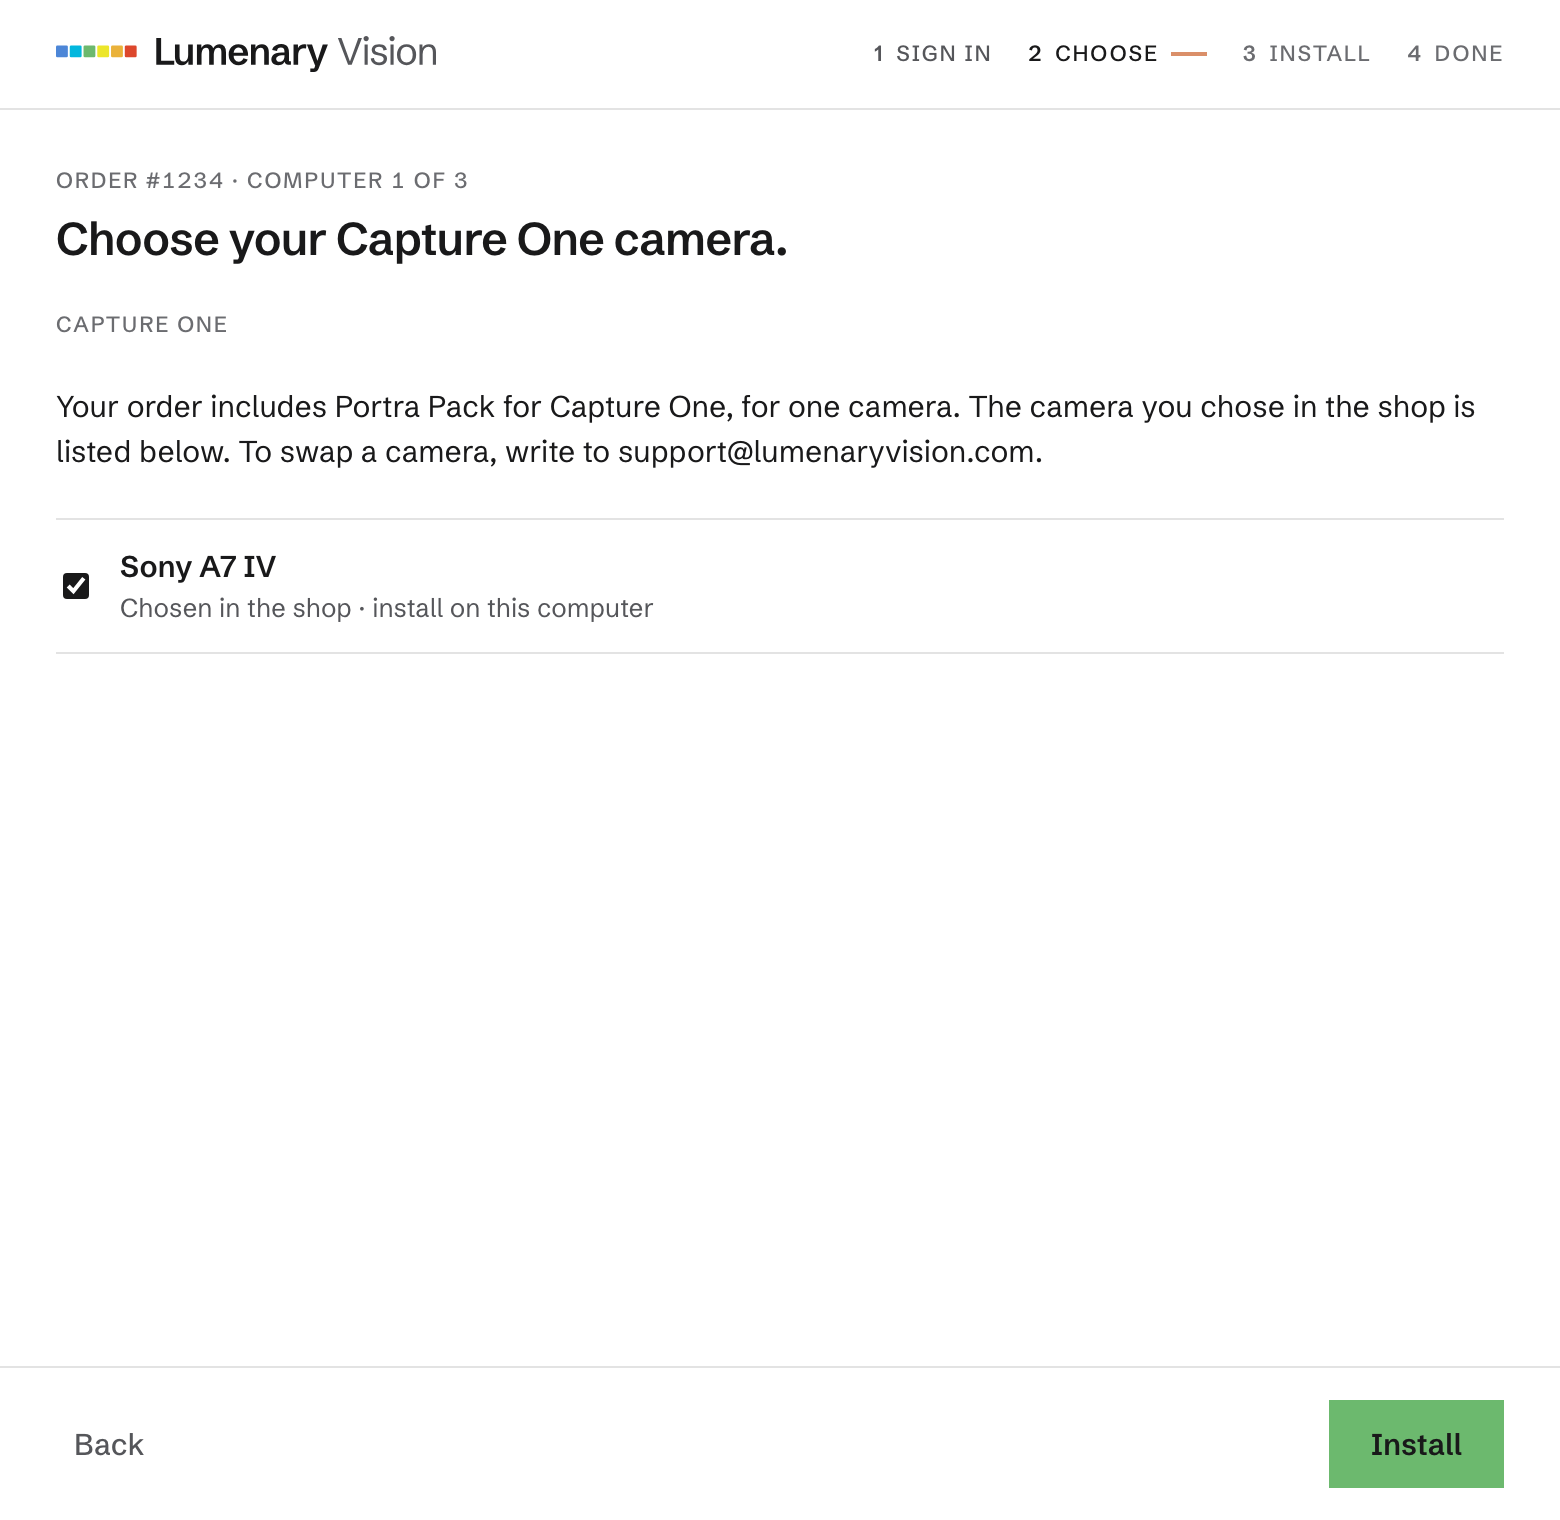
Every pack comes as styles for the one camera you chose in the shop.
Each style carries the colors and the film curve of the film stock. You apply one per photo. The installer downloads the styles of your camera, so there is nothing to unzip.
| Your pack | Styles per camera | Scanners |
|---|---|---|
| Essential Frontier | 44 | Frontier |
| Portra Pack | 64 | Frontier and Noritsu |
| C-41 Edition | 267 | Frontier and Noritsu |
| Cine Edition | 64 | Frontier and Noritsu |
| B&W Edition | 36 | Frontier and Noritsu |
| Master Collection | 367 | Frontier and Noritsu |
In every pack
- Film stylesOne style per film stock, scanner and exposure, with the colors and the film curve inside
- AVS Toolkit48 styles for quick edits on top: Tone, Color, Grain
For Capture One on a Mac or Windows computer. Lightroom and Photoshop packs have their own guide. No AVS Lab Tech in Capture One.
02 · Two ways
Install with the installer, or copy the styles by hand.
Pick one, not both. The installer is the standard way, the manual route is the backup.
Installer
Analog Vision Studio Installer · Mac and Windows
- DoesInstalls your styles and the AVS Toolkit in one go.
- HowIt downloads the styles of your camera and checks every file. Your own styles stay where they are.
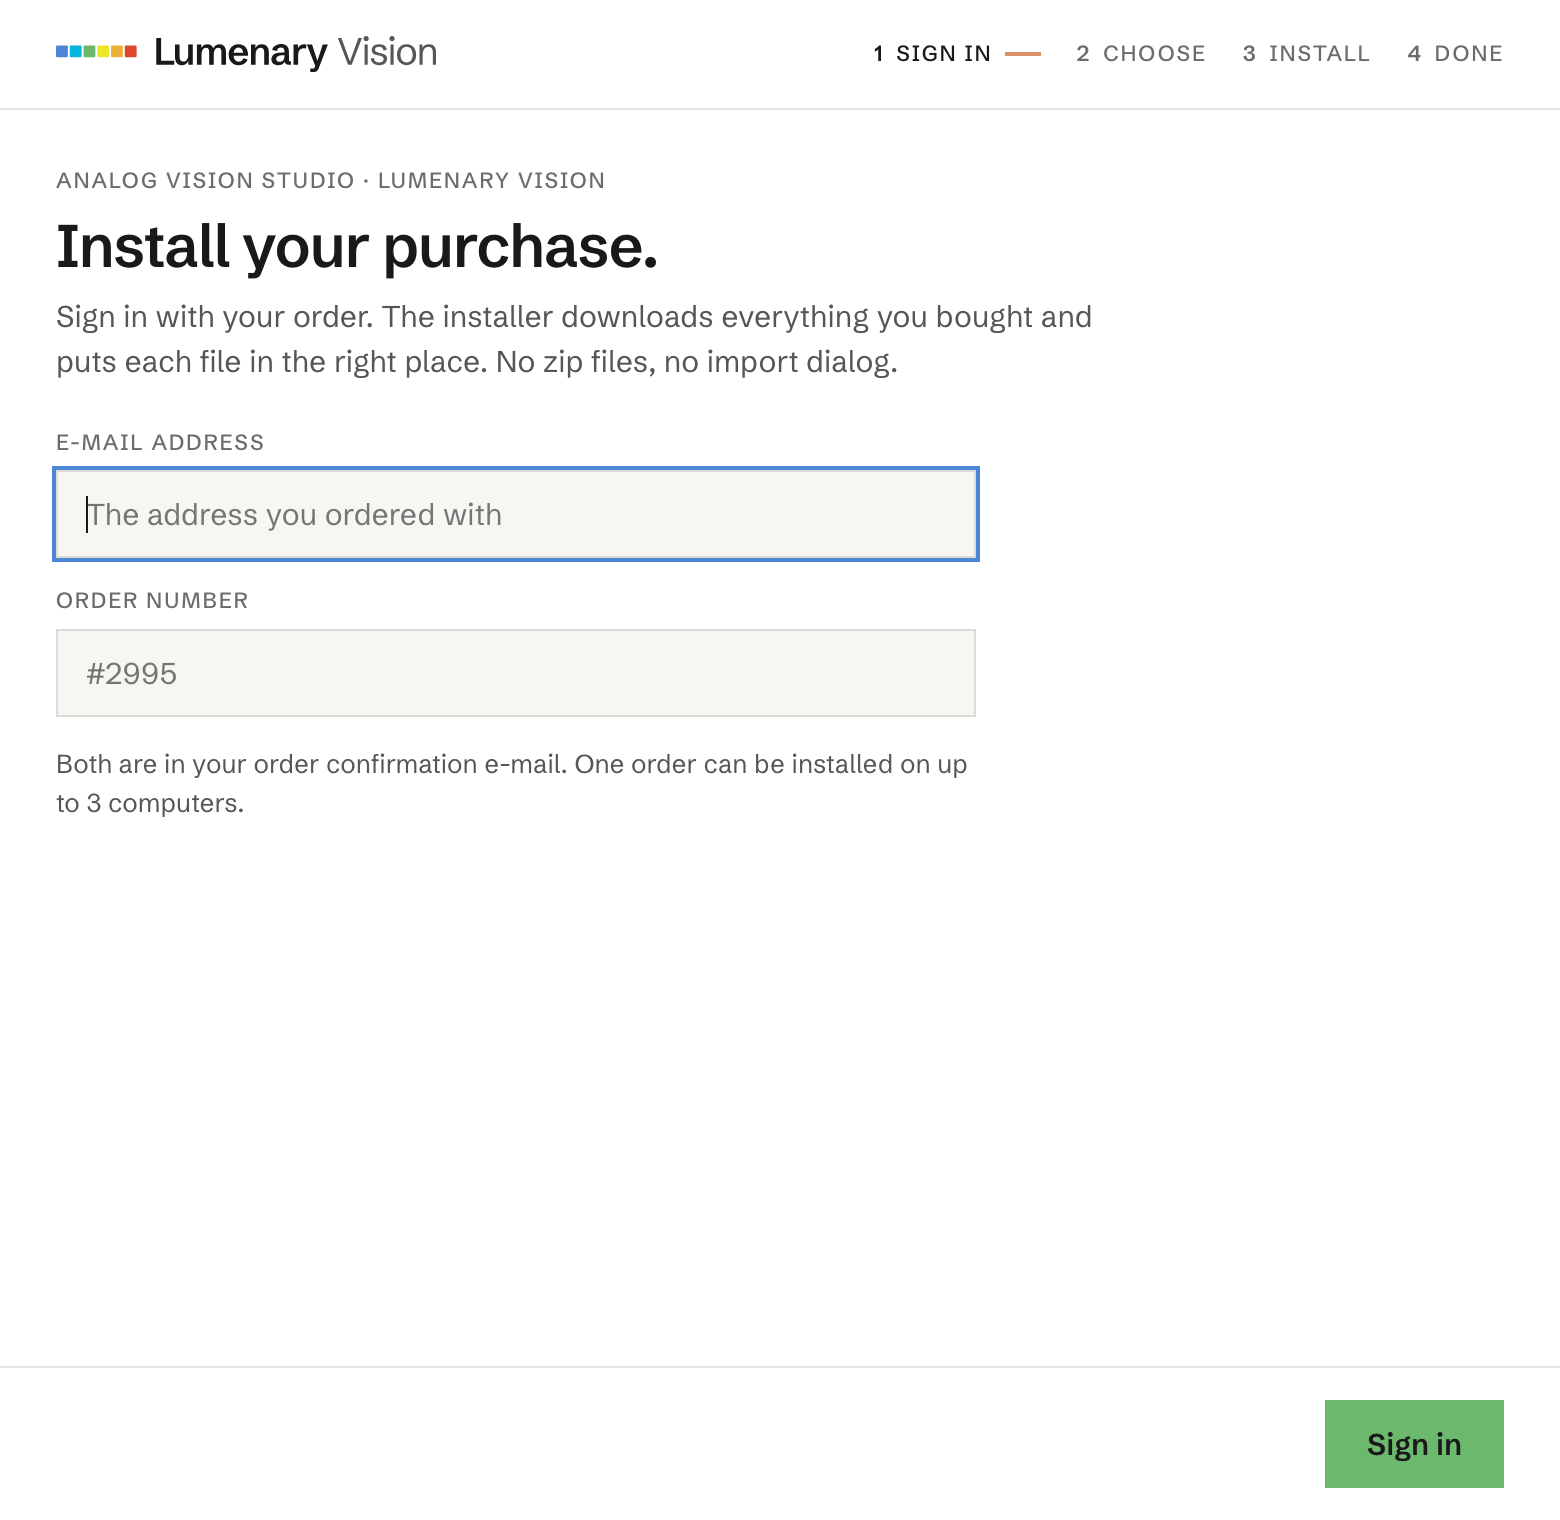
- NeedsYour e-mail address and order number. Up to 3 computers per order.
By hand
A ZIP file and a copied folder
- DoesYou copy the style folder of your camera yourself.
- Use whenThe installer can't run on your computer.
- NeedsThe ZIP file with the styles of your camera. Reply to your order e-mail and I'll send it.
The styles are built for the camera you chose in the shop. They won't look right on any other. I built and checked the styles in Capture One Pro 16.8 on a Mac. Capture One on iPad and iPhone is not covered.
03 · The installer
One small program downloads the styles of your camera and installs them.
The Analog Vision Studio Installer is the same for every pack. It checks every file after it copies it. Restart Capture One afterwards: it reads new styles only when it starts.
Download the installer for your computer
Also at lumenaryvision.com/pages/install and in your download e-mail.
Open it
Mac: open the disk image, then double-click Install Analog Vision Studio. Windows: double-click the .exe. If Windows says Windows protected your PC, click More info, then Run anyway. See it step by step.
Sign in
With the e-mail address you ordered with and your order number, both in your order confirmation. One order installs on up to 3 computers.
Check your camera
The camera you chose in the shop is listed and ticked. Click Install. To swap a camera later, write to support@lumenaryvision.com.
Restart Capture One
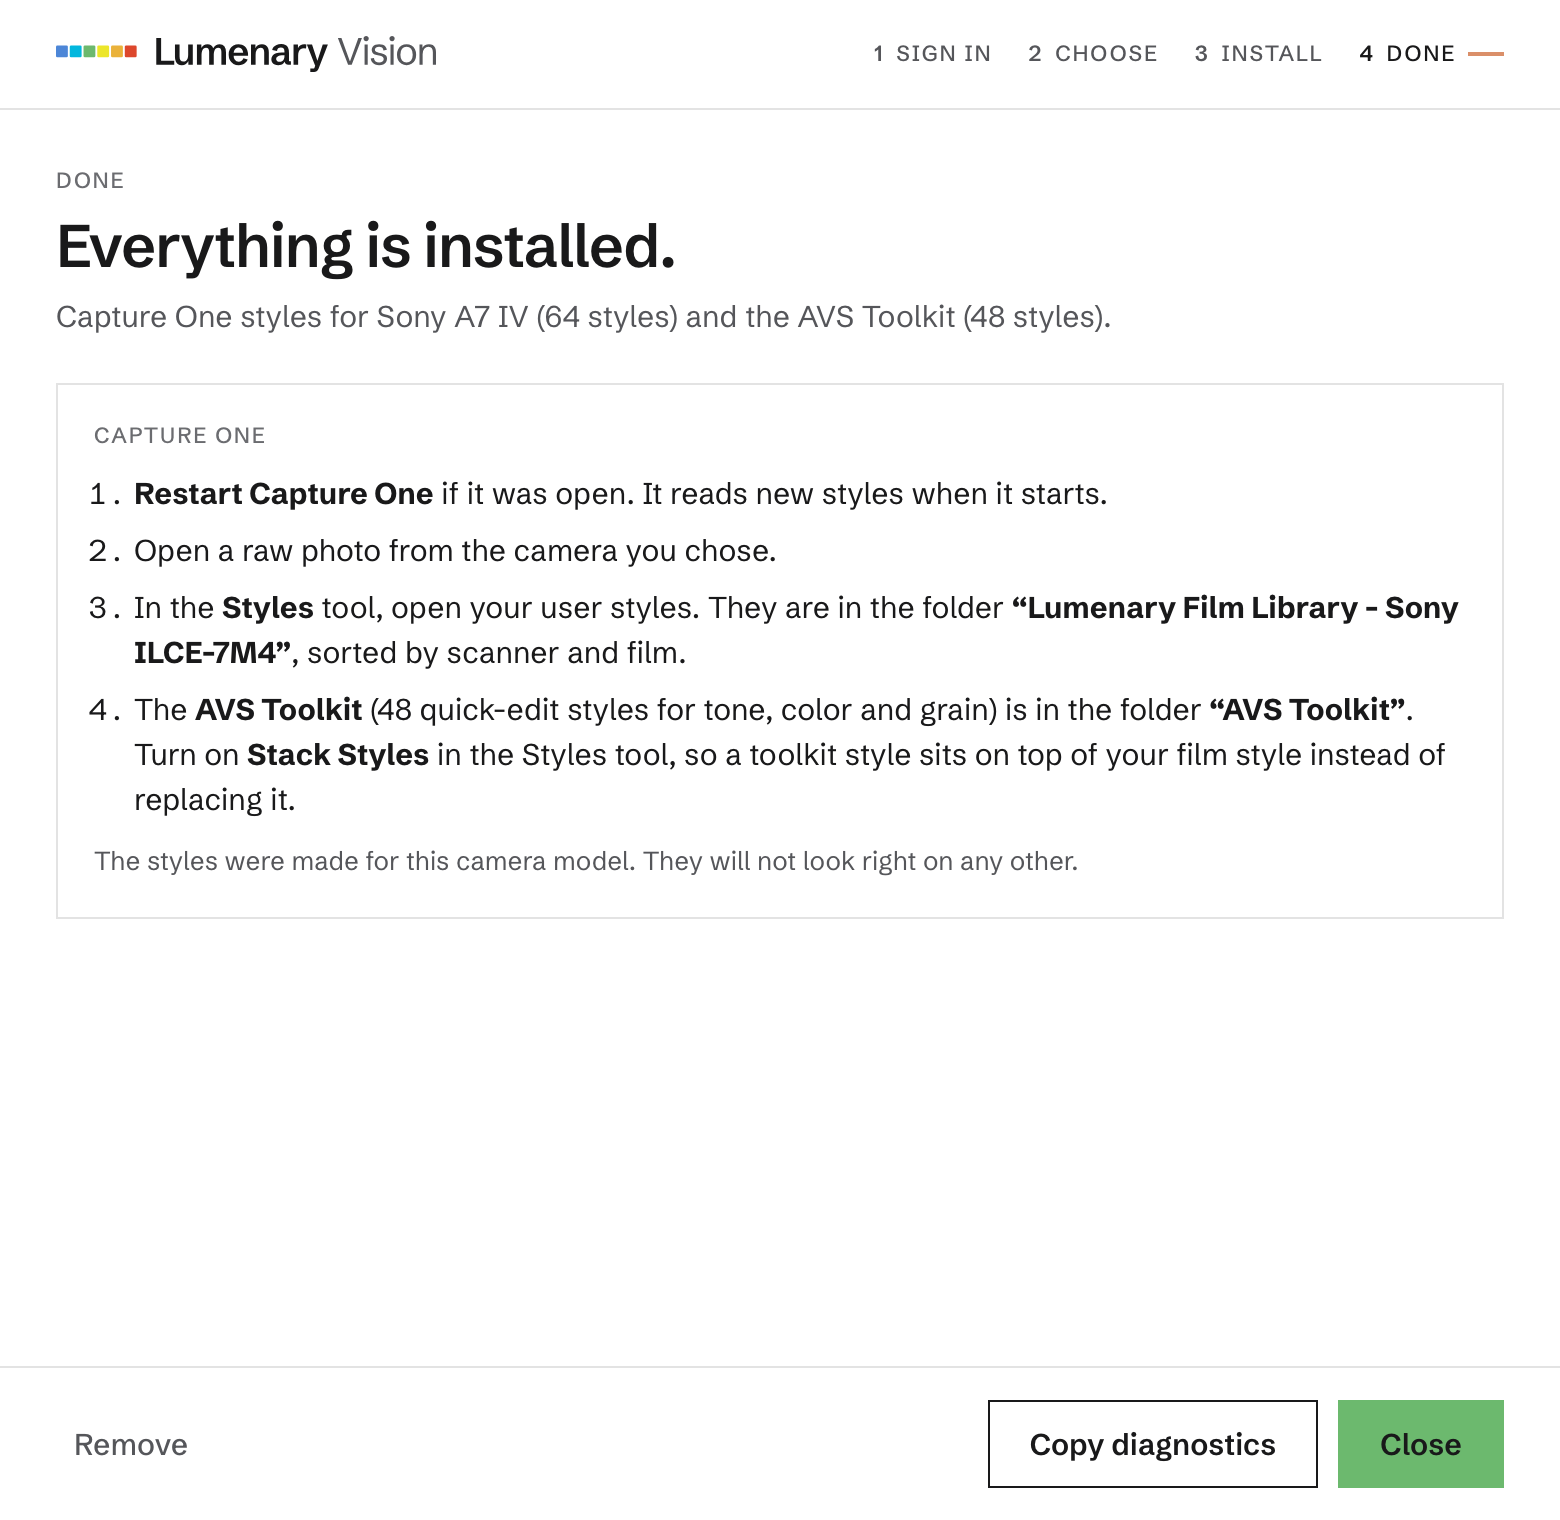
Wait for “Everything is installed.” first. Capture One open during the install is fine, it just needs the restart.
Open your user styles
In the Styles tool, with a raw photo from your camera. They sit in the folder “Lumenary Film Library” with your camera's name, sorted by scanner and film.
Installer · Windows only
Windows: click More info, then Run anyway.
The first time you open the installer on Windows, SmartScreen stops it with a blue window: “Windows protected your PC”. It does that with new programs it doesn't know yet. Two clicks get you past it. Only do this for the file you downloaded from lumenaryvision.com or the link in your order e-mail.
Run anyway
Windows SmartScreen, first open only
Double-click the installer
Windows shows Windows protected your PC. There is only a Don't run button at first.
Click
The small link under the text. A second button appears.
Click
The installer opens.
Your browser may ask whether to keep the download first: choose Keep.
Nothing to confirm
Signed and notarized by Apple
The Mac installer opens without a warning. Open the disk image and double-click Install Analog Vision Studio.
04 · Capture One · Important
Turn on Stack Styles, so a second style adds to the first.
Capture One replaces your first style when you apply a second one. With Stack Styles on, styles add up: your film style stays, and the toolkit adds its changes on top.
Before you use the toolkit
Without Stack Styles, a second style replaces the first.
A toolkit style would take your film look out again. With it on, each tool keeps the value of the style you applied last. Everything else stays.
Open the Styles and Presets tool
It holds the built-in styles and your user styles.
Open the tool's menu
In the header of the tool.
Choose
A check mark shows that it's on.
Apply the film style first, then the toolkit styles
Where two styles change the same tool, the one you applied last wins.
Film look gone after a toolkit style? Stack Styles is off. Turn it on and apply the film style again.
05 · By hand
Copy the whole style folder of your camera into Capture One's Styles folder.
The backup way, for when the installer can't run. Reply to your order e-mail and I'll send you the ZIP file. Unzip it first. Copy the folder, not single styles: every style needs the .icm file that sits next to it. Used the installer already? Skip this chapter.
macOS
Open the Styles folder
In Finder press Cmd+Shift+G and paste the path below.
~/Library/Application Support/Capture One/StylesCopy your camera's folder into it
“Lumenary Film Library - …” with your camera's name. The whole folder.
Restart Capture One
Styles load at startup.
Windows
Open the Styles folder
Press Win+R and paste the path below.
%LOCALAPPDATA%\CaptureOne\StylesCopy your camera's folder into it
“Lumenary Film Library - …” with your camera's name. The whole folder.
Restart Capture One
Styles load at startup.
Find a folder named Styles50 instead of Styles? Use that one. Copy the AVS Toolkit folder into the same Styles folder.
06 · Is it working?
Four quick checks tell you in one minute.
Do them in Capture One, with a raw photo from the camera you chose. Nothing shows up? Restart Capture One first. It only reads new styles at startup.
Your styles are listed
In the Styles tool, open your user styles. A folder “Lumenary Film Library” with your camera's name holds one folder per scanner, and in it one per film stock.
A style changes the photo
Click one, for example a Portra 400 style at 0 EV. The photo changes and looks right.
The camera matches
Each style is built for one camera model. A raw file from another camera won't look right with it.
Stack Styles is on
In the menu of the Styles and Presets tool, Stack Styles is ticked. A toolkit style then adds to your film style.
07 · Using the styles
Your styles are sorted by scanner and film stock, with six exposures in each.
Pick a film stock folder, then one style.
Lumenary Film Library - Sony ILCE-7M4
Frontier
Noritsu
In a film folderPortra 400 −2 EV Frontier - Sony ILCE-7M4
Portra 400 −1 EV …
Portra 400 0 EV …
Portra 400 +1 EV …
Portra 400 +2 EV …
Portra 400 +3 EV …
Exposure
Each exposure is its own scan of the film. They differ in color and contrast, not brightness. Pick by the look you want.
Camera name
The folder carries the technical name of your camera, such as ILCE-7M4 for the Sony A7 IV. The camera list shows both.
One style
Apply one film style per photo. It carries the camera profile, the colors and the film curve.
What stays yours
The styles leave white balance, exposure, grain, lens correction and sharpening to you.
08 · AVS Toolkit
The toolkit adds 48 styles for quick edits on top of your film style.
They sit in the folder AVS Toolkit, in three series. Each one sets only its own tool and leaves your film style alone. Most come in two strengths. Turn on Stack Styles first, otherwise a toolkit style replaces your film style.
Tone · 18 styles
Contrast and density
Contrast, Shadows and Highlights, each in + and − with a stronger ++ and −−, on the Luma curve. Faded Blacks, Faded Whites and Faded Blacks and Whites, each with a stronger +, on the RGB curve. A contrast style and a fade style work together.
Color · 20 styles
Tints and saturation
Shadow tints in cyan, green, blue, red and magenta, highlight tints in red, yellow and cyan, each with a stronger +. Saturation + and − with a stronger ++ and −−.
Grain · 10 styles
Grain and softness
Fine, Medium, Coarse and Mono grain, each with a stronger +, for the whole frame. Softness and Softness + take the digital edge off: stack one on a grain style.
Install
One set for every camera
The installer adds the AVS Toolkit with your first camera, once per computer. Installing by hand? Copy it along with your styles, see By hand. The masking series of the Lightroom toolkit isn't part of this version.
09 · Your edit, in order
One job per tool: work from top to bottom and don't go back up.
If a later step sends you back, the earlier step was off. Fix it there. Skip what you don't need, keep the order.
- Exposure firstStart from an evenly exposed frame, before any film style. Exposure tool.
- Film styleOne style from your camera's folder. The six exposures are a look, not a brightness. Styles tool.
- White balanceStart from As Shot, then fine-tune. White Balance tool.
- ToneContrast and density on the curve. Toolkit: Tone styles. Curve tool.
- ColorSingle colors and mood. Toolkit: Color styles. Color Balance tool.
- Local adjustmentsMasks come after the whole frame works. Layers.
- FinishGrain and sharpening come last. Toolkit: Grain styles. Film Grain and Sharpening tools.
10 · Quick fixes
Most problems are solved by one restart of Capture One.
I don't see the styles.
The film look disappeared.
The colors look off.
Capture One says an ICC profile might be missing.
I want a different camera.
My camera isn't in the list.
Windows protected your PC.
The installer says my computers are used up.
I can't find the installer link.
Can I use the styles in Lightroom?
Capture One was open during the install.
11 · Support
Still stuck? Write to me.
Include your Capture One version, your camera, whether you used the installer or installed by hand, and what you clicked. Installer problem? Click Copy diagnostics in the installer and paste it into your e-mail.
License. Analog Vision Studio, including the film profiles, the camera profiles, the workflow presets and the AVS Lab Tech plugin, is licensed, not sold, for use by a single user. You may use it for personal and commercial photography on devices you own or control. It may not be redistributed, resold, shared, sublicensed or made available to third parties in any form. All files, including source code and embedded data, remain the intellectual property of Lumenary Vision, Sebastian Koch. Modification, reverse engineering, decompilation or extraction of the files or their data is not permitted.
A · CAMERAS FOR CAPTURE ONE
You can choose from 344 camera models for Capture One.
Search by any name, for example A7 IV, X-T5 or Z6III. You choose your camera in the shop, before you buy. The styles are built for that one camera model.
Loading the camera list.